


Resizing images is one of the most common tasks when working with digital photos. Whether you are preparing a picture for a blog post, updating a website, creating a social media graphic, or sending an image by email, choosing the right image dimensions is important.
Large images can take up unnecessary storage space and increase website loading times. On the other hand, images that are too small may look blurry when displayed at larger sizes.
The good news is that you can resize images online using simple tools without installing complicated software. In this guide, we will explain how image resizing works, how to resize images correctly, and how to maintain the best possible visual quality.
What Is Image Resizing?
Image resizing is the process of changing the width and height of a digital image, usually measured in pixels.
For example, you might resize an image from 3000 × 2000 pixels to 1200 × 800 pixels to make it more suitable for a website.
Resizing can reduce the number of pixels in an image, making the file easier to manage and potentially reducing its file size. However, resizing does not always significantly reduce file size by itself because the result also depends on the image format and compression settings.
Why Should You Resize Images?
1. Improve Website Loading Speed
Images that are much larger than their displayed dimensions can require unnecessary downloads. Resizing them appropriately can reduce the amount of data visitors need to load.
2. Prepare Images for Social Media
Different platforms and placements use different image dimensions. Resizing helps your images fit the intended layout without unwanted cropping or distortion.
3. Save Storage Space
Reducing image dimensions can help save storage space, particularly when working with large collections of photographs.
4. Make Images Easier to Share
Some websites, forms, and email services impose image dimension or file-size limits. Resizing can help you meet those requirements.
5. Maintain Consistent Design
Using consistent image dimensions makes blog layouts, product galleries, and other website sections look more organized.
How to Resize an Image Online
You can resize an image using an online image resizing tool in a few simple steps.
Step 1: Select your image
Choose the image you want to resize from your device. Keep a copy of the original file in case you need it later.
Step 2: Enter the new dimensions
Specify the desired width and height in pixels. Choose dimensions appropriate for the image’s intended use.
Step 3: Preserve the aspect ratio
Enable the aspect-ratio or proportional-resizing option if available. This helps prevent the image from becoming stretched or squashed.
Step 4: Preview the result
Check that the resized image still looks clear and that important details remain visible.
Step 5: Download the image
Save the resized image in a suitable format, such as JPG, PNG, or WebP.
Step 6: Compress if necessary
If you plan to use the image on a website, consider compressing it after resizing to reduce the final file size further.
You can explore image resizing and optimization resources on CompressImageFree.store.
What Image Dimensions Should You Use?
The ideal dimensions depend on where the image will appear.
| Image Type | Example Dimensions |
|---|---|
| Blog featured image | 1200 × 630 pixels |
| Website content image | 800 × 600 pixels |
| Square social graphic | 1080 × 1080 pixels |
| Presentation image | 1920 × 1080 pixels |
| Small thumbnail | 300 × 200 pixels |
These are examples, not universal requirements. Always check the specifications of your website theme or publishing platform.
How to Resize Images Without Losing Quality
Resizing an image to smaller dimensions usually works well, but some detail is inevitably lost when pixels are removed. You can minimize visible quality loss by following these tips.
Start With a High-Quality Original
Whenever possible, use the original image rather than a previously resized or heavily compressed copy.
Keep the Correct Proportions
Changing width and height independently can distort the image. Maintain the original aspect ratio unless you intend to stretch the image or crop it.
Avoid Enlarging Small Images Too Much
Increasing an image’s dimensions does not restore missing detail. Excessive enlargement can create blur or pixelation.
Choose the Right File Format
JPG works well for many photographs, PNG is useful for transparent graphics, and WebP can provide efficient compression for many web images.
Use Appropriate Compression
After resizing, select a reasonable compression setting. Excessive compression can introduce artifacts, especially around text, edges, and fine details.
Image Resizing vs. Image Cropping
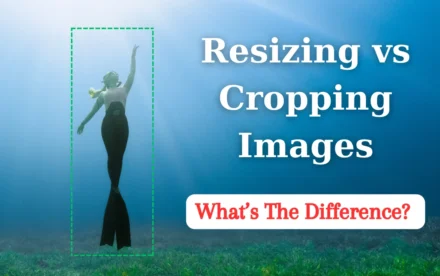
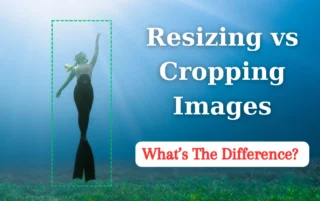
Image resizing changes the dimensions of the entire image, while cropping removes part of the image.
For example, resizing a landscape photograph makes the whole picture smaller. Cropping the same photograph might remove unwanted areas around the edges while keeping the main subject prominent.
If you need to preserve the full scene, resizing is usually the better choice. If you need to change the composition or fit a specific aspect ratio, cropping may be more suitable.
Common Image Resizing Mistakes
- Stretching images by changing width and height independently.
- Enlarging low-resolution images excessively.
- Uploading unnecessarily large images to websites.
- Using the same dimensions for every image.
- Forgetting to check the final image quality.
- Ignoring compression after resizing.
Avoiding these mistakes can help you create better images for websites, social media, and everyday use.
Frequently Asked Questions
Can I resize images online for free?
Yes. Many online tools offer image resizing features for free, although some may impose limits on file size, dimensions, or available formats.
Does resizing an image reduce file size?
Reducing an image’s pixel dimensions often reduces its file size, but the amount varies according to image content, file format, and compression settings.
Can I resize an image without changing its shape?
Yes. Use an aspect-ratio lock or proportional-resizing option to maintain the original proportions.
What is the difference between pixels and file size?
Pixels describe the image’s dimensions and resolution. File size describes how much storage the image requires, usually measured in KB or MB. Two images with identical dimensions can have very different file sizes.
Resizing images online is a simple way to prepare pictures for websites, blogs, social media, and other digital projects. By selecting suitable dimensions, preserving the aspect ratio, and using appropriate compression, you can create images that look good and load efficiently.
Always keep your original image, review the resized result, and choose dimensions based on your intended use.
Visit CompressImageFree.store for more helpful guides on image resizing, cropping, editing, compression, and optimization.
Leave a Comment